


As an eCommerce business, keeping customers informed about their shipment tracking updates is crucial for providing a seamless post-purchase experience. Effective shipment tracking emails turn anxious moments into smooth-sailing journeys, shaping the narrative from purchase to delivery. With Despatch Cloud Shipping, you can easily automate these shipment tracking emails, customising the look and feel to match your brand’s aesthetic while including crucial information like courier details, tracking numbers, and direct links for convenient shipment tracking.
This guide will explore best practices for creating engaging tracking updates, walk you through building email templates in Despatch Cloud Shipping, and show you how to set up automated notifications for a streamlined shipping process. By mastering these tools, you’ll enhance the overall customer experience and stay ahead of competitors in the eCommerce shipping space.
Best Practises When Creating Shipment Tracking Emails
1. Include a tracking link
Providing a tracking link is crucial in shipment tracking emails, as it allows customers to monitor the status of their order in real-time. This sense of control and transparency helps alleviate anxiety and builds trust in your eCommerce business. The tracking link should be prominently displayed and easily accessible, enabling customers to check their order’s progress with a simple click.
2. Include product details
To reinforce confidence and ensure accuracy, include an image of the purchased product along with its specifications and purchase information. This visual representation helps customers quickly verify that the correct item is being shipped, reducing the likelihood of confusion or misunderstandings.
3. Provide/highlight an estimated delivery date
Customers appreciate knowing when to expect their order’s arrival. Prominently displaying the estimated delivery date in your shipment tracking email can help manage expectations and alleviate potential concerns about delays. This simple yet crucial detail can significantly enhance the overall customer experience.
4. Cross-selling opportunities
While the primary purpose of a shipment tracking email is to provide order status updates, it can also present an opportunity for cross-selling. You may consider suggesting complementary products or accessories that complement the customer’s recent purchase. However, it’s essential to strike a balance and ensure that cross-selling efforts do not overshadow the primary objective of the email.
5. Keep it on brand
A shipment tracking email is another touchpoint in the customer journey, so it should align with your brand’s visual identity and tone of voice. Incorporating branded design elements and consistent messaging can help create a cohesive and recognisable experience for your customers.
6. Provide customer support resources
In case customers encounter any issues or have questions regarding their order, provide clear and accessible channels for contacting your customer support team. This proactive approach demonstrates your commitment to excellent service and can help mitigate potential frustrations or concerns.
By following these best practices on shipment tracking emails, you can create informative and engaging shipment tracking emails that enhance the overall customer experience, build trust, and foster long-lasting relationships with your eCommerce customers.
How to create an email template in Despatch Cloud Shipping
Our email builder explained
Despatch Cloud Shipping allows you to customise the look and feel of shipment tracking emails by using email templates. You can create different templates for each sales channel, which is beneficial if you operate multiple websites under different names, brands, or companies. The email templates enable you to match the aesthetic of your tracking emails to your brand’s visual identity.
Despatch Cloud Shipping provides a built-in email template builder with a drag-and-drop interface, allowing you to create functional and professional-looking emails without any coding experience. This user-friendly builder streamlines the design process, making it faster and more convenient. You can also insert variables like customer name, product name, or shipping method to personalise your communications further.
Step-by-step guide
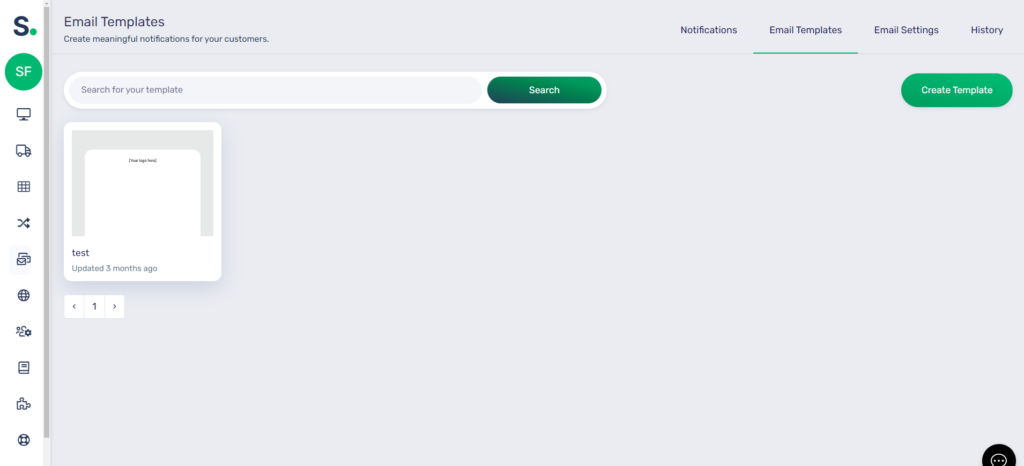
- To access the Email Templates page, click the Notification button in the left-hand menu and then choose the Email Templates tab from the top-right corner of the page.

- You can choose to Edit, Clone, or Delete the default template. Alternatively, create a new template using the Create Template button.
- If you’re not confident with HTML and CSS, duplicate the default template and edit it using the Editor. Use the template builder’s drag-and-drop functionality to add and move the different elements within your email.
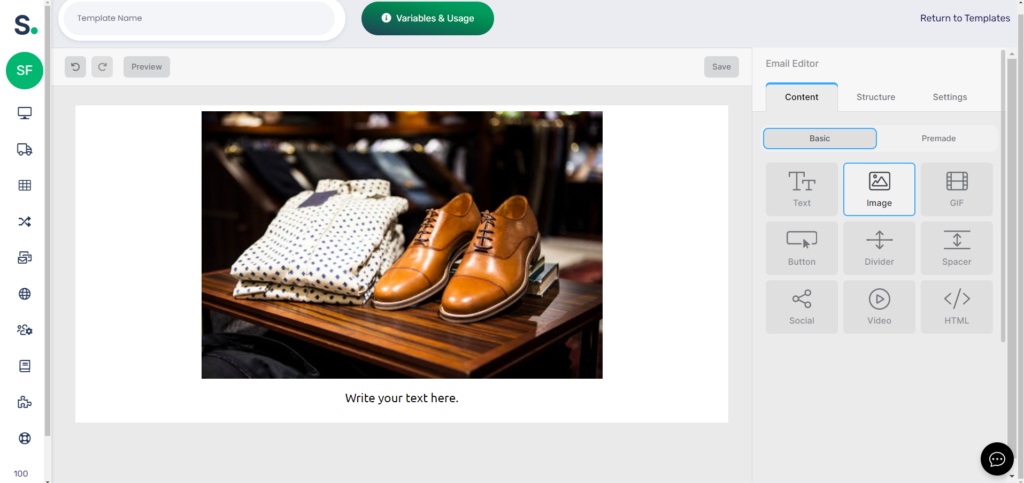
- Within the editor, you’ll find variables like {NAME} and {COMPANY_NAME} that will be populated with the appropriate values in the email. You’ll have access to a JSON-structured list of variables along with practical guidance by clicking the Variables & Usage button next to the naming field.
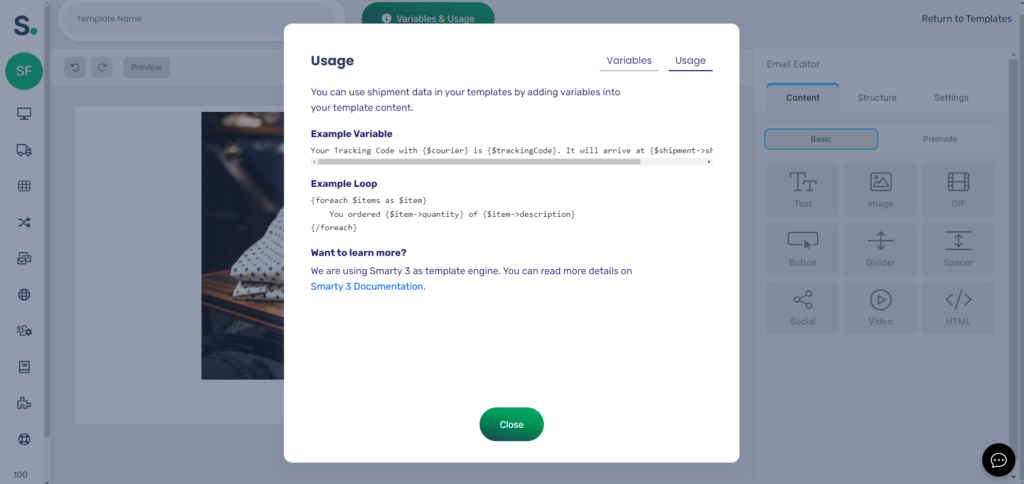
- It’s important to note that we employ Smarty 3 as the template engine for this process, and you can find further details in the Smarty 3 Documentation for a more in-depth understanding.
- For more guidance and tips on how to use our template builder, please read our documentation.
By following these steps, you can create customised email templates that align with your brand’s aesthetic and provide a seamless post-purchase experience for your eCommerce customers.
How to set up notifications in Despatch Cloud Shipping
Understanding your notifications dashboard
The notifications dashboard in Despatch Cloud Shipping serves as a centralised hub for monitoring and managing your shipment notifications. It provides a comprehensive overview of your system’s activities, supported by informative charts and graphs that offer a snapshot of your shipment reports.
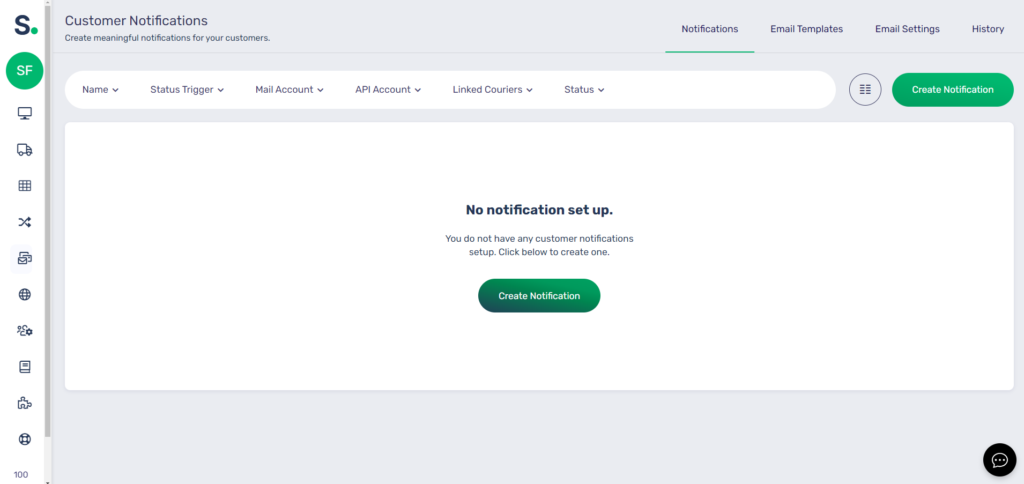
The dashboard is easily accessible; simply click the Notifications button from your left-hand menu.
At the top of the page, you’ll find a set of filters, a powerful tool for refining your notification search. These filters allow you to narrow down the displayed information based on specific criteria, such as status trigger, mail account and linked couriers.
Directly below the filters, you’ll find a breakdown of all the notifications you have set up, providing a quick overview of your entire notification system.
Step-by-step guide
To set up notifications in Despatch Cloud Shipping, follow these steps:
- Head over to Notifications. Then Click the Create Notification button to get started.
2. Give your notification a name. Then select the API account and the couriers the notification will be linked to. Next, select the parameters/criteria to be met for that notification to be triggered.
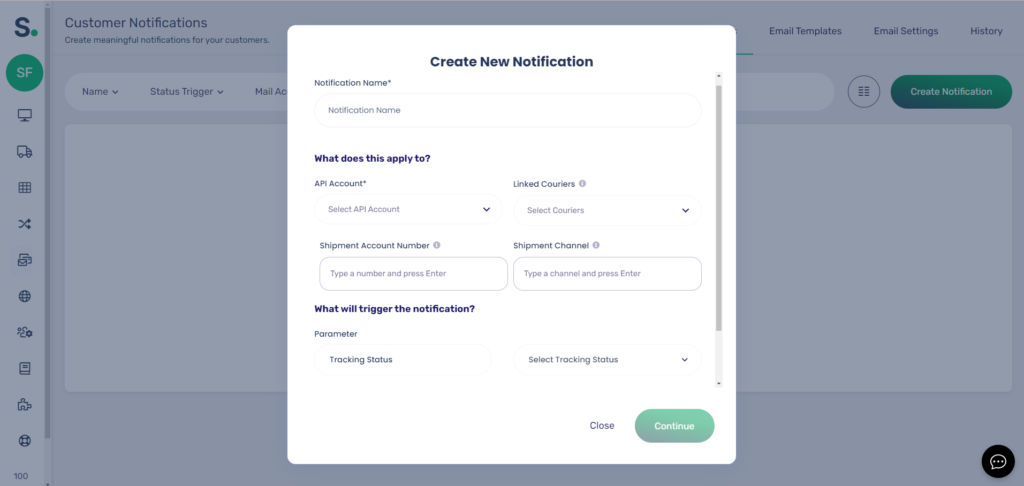
3. Next, you’ll be asked to add a subject line, mail account, sender name and sender email for your notification. Then, select the email template you wish to use for that notification.
4. Once you’re done, simply click the Create Notification button and you’re all done.
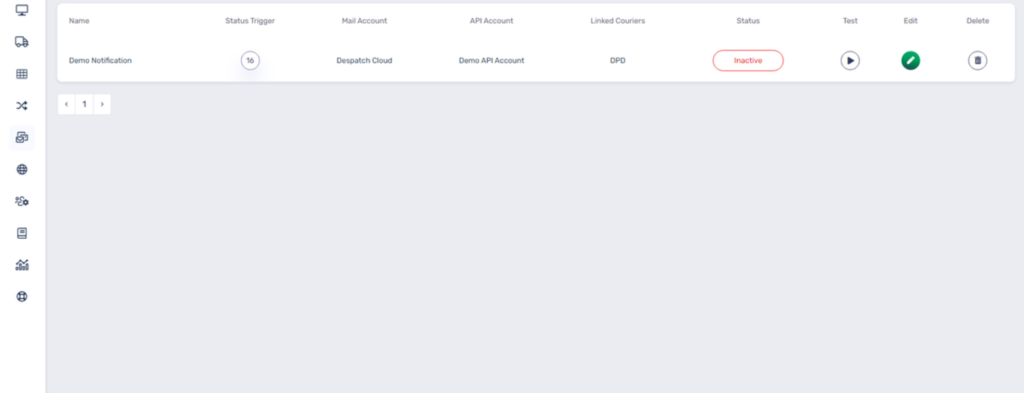
Your notification will now be added to your notification list. You can edit, delete or simply deactivate your notification at any time. Please read our documentation for additional support and guidance on setting up a notification.
Conclusion
In the world of online retail, providing an exceptional post-purchase experience is paramount. By automating shipment tracking emails with Despatch Cloud Shipping, eCommerce businesses can foster trust and transparency, elevating customer satisfaction while remaining competitive. The seamless integration of branded design elements, detailed product information, and real-time tracking links empower customers to track their orders effortlessly, allowing for a cohesive and engaging post-purchase experience.
The comprehensive features and intuitive interface of Despatch Cloud Shipping simplify the process of creating customised email templates and setting up automated notifications. By implementing the best practices outlined in this guide, eCommerce businesses can stay ahead of the curve, delivering a post-purchase journey that exceeds customer expectations and solidifies their position in the competitive online marketplace.
Shipment Emails FAQs
Key elements you should have in a good shipment tracking email include:
- Tracking link
- Tracking number
- Estimated delivery date
- Shipping Address
- Customer support information
- Order details
- Item description
To set up automatic tracking emails in Despatch Cloud Shipping, please log into your Shipping account and go to your Notifications tab. Then click the Create Notification button, and fill out all the relevant fields with your notifications specifications. Our intuitive platform will guide you through the entire process. Alternatively, follow the steps detailed in this guide or visit our documentation.